Creating a contract in Cloud Contracts 365 is straightforward, utilising the platform's intuitive Contract Builder. This tool ensures that the resulting document is both professional and compliant, ready for seamless distribution.
Video Guide
How do I find Contract Builder?
All contract creation starts via the Contract Builder dashboard.
-
Click on the ‘Contract Builder’ option in the left hand navigation pane. This will take you to your Contract Builder dashboard.
-
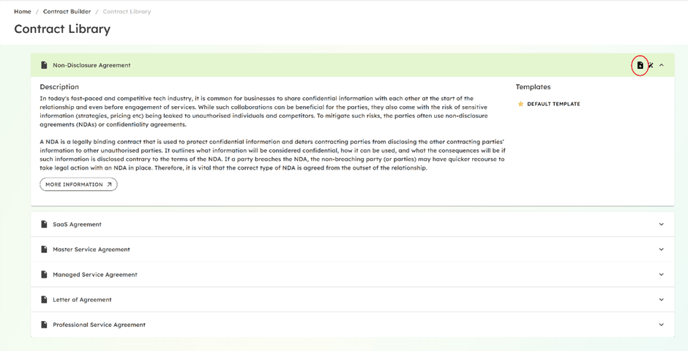
Press the ‘Create’ button in the top right of the screen. This will take you to the Contract Library. From here select the contract type you would like to create and click the ‘create new contract’ icon on the right.

How do I select a template?
From the dashboard select the contract type you would like to create and click the ‘create new contract’ icon on the right.

If you have customised and saved an alternate version of the template then you will also be able to select it by clicking on the ‘create contract from template’ wand icon on the right.
How do I use the questionnaire?
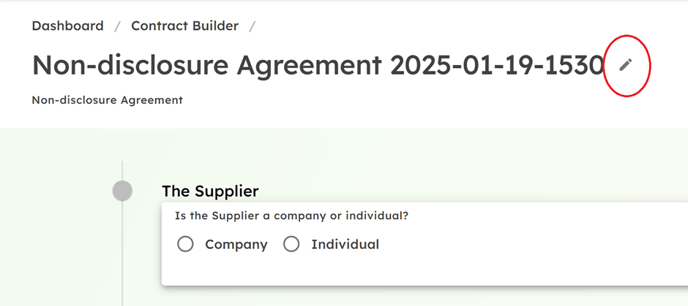
Your chosen contract questionnaire is generated with a default file name. You can amend the contract file name by clicking on the pencil icon.

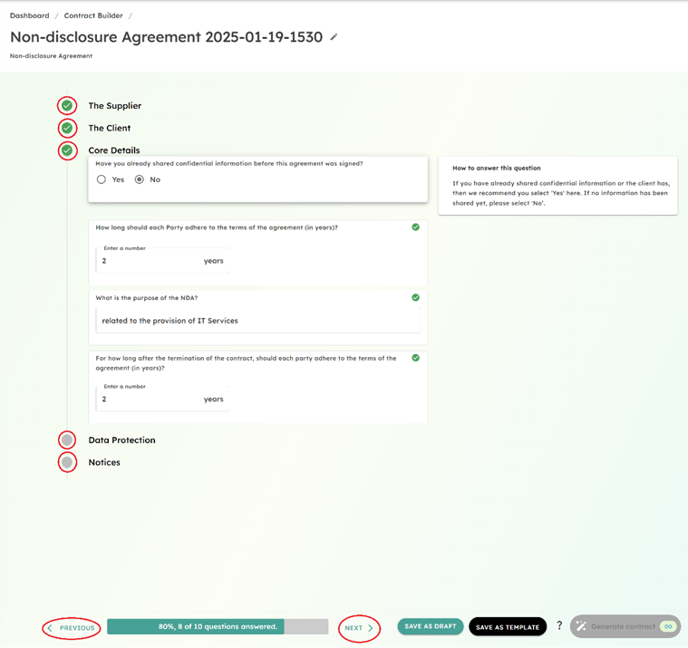
Each contract type questionnaire is split into sections. Clicking on a section title or the ‘Next’/’Previous’ buttons at the bottom will reveal the questions in the section.

Companies House search
When answering questions regarding the ‘Supplier’ (i.e. your company) and ‘Client’ (i.e. your customer) the search bar allows you to search and retrieve official data from Companies House such as address and company number, ensuring you are always using the correct company details.

You also have the option to manually add company details to your contract.

Saving as favourites
You can choose to save any company as one of your ‘favourites’. This means that when you use the company search bar again your favourite companies appear at the top of the display list, followed by any you have recently viewed, making it easier to find companies you regularly deal with.

Recommended answers
To help you in the process of creating contracts we have pre-populated questions with recommended answers where possible and provided guidance on how to answer each question. Clicking into a question will reveal information in the ‘How to answer this question’ section on the right which gives additional information and guidance.
If you use the recommended answer then a green tick icon will displayed in the question card.
You are not obliged to use the recommended answer, however if you do not, a warning icon, and where relevant, a message will appear highlighting this (don’t worry, you will still be allowed to proceed with generating a contract).

Once you have answered all of the questions in a section, a green tick icon will appear to confirm the section has been completed successfully.
If a section has been started but not fully completed the section icon will turn orange and you will be prevented from generating the contract.

The progress bar at the bottom of the screen shows you how much of the questionnaire is left to complete.

Once all questions have been answered and sections completed (all sections showing a green tick), you can then click ‘Generate Contract’ to create the full contract as a Microsoft Word (.docx file format) document. Once you have agreed to proceed you will be charged 1 Contract Builder credit to generate the document.

Processing will take a short moment and once complete your contract will be in stored in Contract Manager to send for e-signatures, set automated reminders etc. At this point you also have the option to download the contract as a Word document.

